Enhancing Doorways: A Step-by-Step Guide on Installing Trim Around a Door
Creating a polished and refined look for your interior involves attention to detail, and one key element in achieving this is installing trim around doors. This comprehensive guide will take you through the process of adding trim to your doors, elevating the aesthetic appeal of your living spaces.
Introduction: The Importance of Door Trim in Interior Design
Door trim serves as the finishing touch that transforms a functional doorway into a visually appealing focal point. Understanding the steps involved in installing door trim empowers homeowners and DIY enthusiasts to enhance the overall aesthetic of their homes.
Step 1: Gather Your Materials and Tools
Before you begin the installation process, gather the necessary materials and tools, including trim boards, a saw, nails, a level, a measuring tape, and a coping saw. Proper preparation ensures a smooth and efficient installation.
Step 2: Measure and Cut Trim Pieces
Accurate measurements are crucial when installing door trim. Learn how to measure and cut trim pieces to fit seamlessly around your door, taking into account the various components such as the header, two side jambs, and the sill.
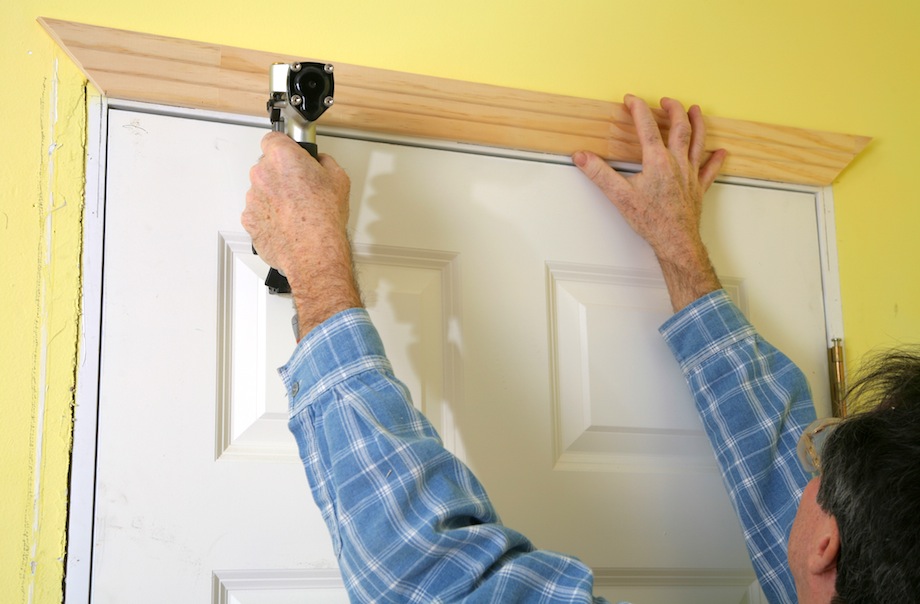
Step 3: Attach the Header Piece
Start the installation by attaching the header piece above the door. Ensure it is level and securely fastened. This horizontal piece lays the foundation for the vertical side jambs.
Step 4: Install the Side Jambs
Follow the installation of the header with the vertical side jambs. Learn techniques for securing these pieces with precision, creating a balanced and symmetrical appearance.
Step 5: Add the Sill Piece
Complete the trim installation by adding the sill piece at the bottom of the door. This step not only provides a cohesive look but also reinforces the structural integrity of the door frame.
Step 6: Nail and Secure the Trim Pieces
Explore best practices for nailing and securing trim pieces to ensure a stable and long-lasting installation. Pay attention to spacing and alignment for a professional finish.
Step 7: Fill and Sand Nail Holes
After securing the trim, address any visible nail holes by filling them with wood filler. Learn how to sand the filled areas for a smooth and seamless surface.
Step 8: Caulk the Joints
Achieve a seamless appearance by caulking the joints where the trim pieces meet the wall and each other. This step not only enhances aesthetics but also provides additional insulation.
Step 9: Prime and Paint
Finish the installation by priming and painting the trim to match your desired color scheme. Explore tips for achieving a flawless finish that complements your interior decor.
Step 10: Final Inspection and Touch-Ups
Conduct a final inspection of the installed trim, checking for any imperfections or areas that may need touch-ups. Attention to detail at this stage ensures a polished and professional outcome.
Frequently Asked Questions (FAQs)
1: Can I install trim around a door without prior carpentry experience?
Yes, with proper guidance and attention to detail, individuals with varying levels of carpentry experience can successfully install door trim.
2: What types of trim are suitable for door installations?
Common types of trim include casing, baseboard, and crown molding. The choice depends on personal preferences and the overall design theme.
3: Should I paint the trim before or after installation?
It is generally recommended to paint the trim after installation to ensure a consistent and flawless finish.
4: Can I use adhesive instead of nails to secure the trim?
While adhesive can be used in conjunction with nails, relying solely on adhesive may not provide sufficient stability for long-term durability.
5: How do I cope the trim corners for a seamless look?
Coping involves cutting one piece of trim to fit the profile of the adjoining piece, creating a snug and seamless joint at the corners.
6: Is it necessary to caulk the joints in door trim?
Caulking joints is optional but recommended for a polished appearance and improved insulation.
7: Can I install door trim on exterior doors?
Yes, the process is similar for both interior and exterior doors, with weather-resistant materials recommended for external applications.
8: What tools do I need for installing door trim?
Essential tools include a saw, nails, a level, a measuring tape, and a coping saw. Additional tools like a miter saw may be useful for more intricate designs.
9: How long does it take to install trim around a door?
The time required depends on factors such as the complexity of the trim design, the skill level of the installer, and the drying time for paint and caulk.
10: Can I install trim around a door without removing the door from its hinges?
Yes, it is possible to install trim without removing the door, although removing the door may provide easier access and a more precise installation.
As you embark on the journey of installing trim around your doors, use this guide as a comprehensive resource to achieve a professional and visually stunning outcome. Whether you’re a seasoned DIY enthusiast or a first-time trim installer, these steps and FAQs will help you navigate the process with confidence.