How to Truss a Turkey: A Comprehensive Guide
Trussing a turkey is a culinary technique that involves tying the bird’s legs and wings to its body before cooking. This method not only enhances the presentation of the turkey but also helps ensure even cooking and prevents the wings and legs from overcooking or burning. In this extensive guide, we will explore the importance of trussing, the step-by-step process of how to truss a turkey, tips for success, and answers to frequently asked questions.
Why Truss a Turkey?
Trussing a turkey serves several purposes:
- Even Cooking: By securing the legs and wings, trussing helps the turkey cook more evenly. This prevents the breast meat from drying out while the dark meat cooks through.
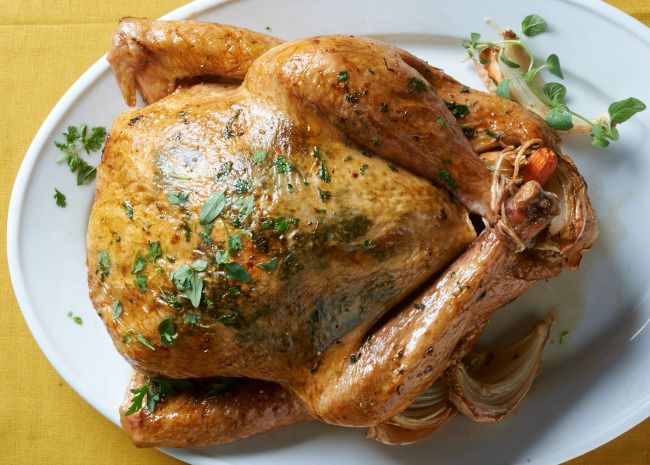
- Improved Presentation: A trussed turkey has a neat and professional appearance, making it more visually appealing when served at the dinner table.
- Retention of Stuffing: If you plan to stuff your turkey, trussing helps keep the stuffing inside the cavity, reducing the risk of it spilling out during cooking.
- Reduced Cooking Time: A trussed turkey can cook faster than an untrussed one, as the compact shape allows for better heat distribution.
- Prevention of Wing Scorching: Tucking the wings behind the back prevents them from burning or becoming overly crispy.
Materials Needed for Trussing
To truss a turkey, you will need the following materials:
- Kitchen Twine: A long piece of unbleached cotton kitchen twine or butcher’s twine is ideal for trussing. Avoid using synthetic twine, as it may melt during cooking.
- Scissors: To cut the twine to the desired length.
- A Thawed Turkey: Ensure that your turkey is completely thawed before trussing. A frozen turkey cannot be properly trussed.
Step-by-Step Instructions for Trussing a Turkey
Step 1: Prepare the Turkey
- Thaw the Turkey: If your turkey is frozen, allow it to thaw in the refrigerator for several days. A general rule of thumb is to allow 24 hours of thawing time for every 4-5 pounds of turkey.
- Remove the Giblets: Take out the giblets and neck from the turkey cavity. These can be used for making gravy or stock.
- Pat Dry: Use paper towels to pat the turkey dry, both inside and out. This helps the skin crisp up during cooking.
Step 2: Cut the Twine
- Measure the Twine: Cut a piece of kitchen twine about 3 feet long. This length should be sufficient to secure the legs and wings.
Step 3: Position the Turkey
- Place the Turkey Breast-Side Up: Set the turkey on a clean cutting board or roasting pan with the breast side facing up. Ensure that the legs are pointing away from you.
Step 4: Tuck the Wings
- Tuck the Wing Tips: Gently tuck the wing tips behind the shoulders of the turkey. This helps keep the wings close to the body and prevents them from burning during cooking.
Step 5: Tie the Legs
- Cross the Drumsticks: Take the ends of the drumsticks and cross them over each other. This will help secure them in place.
- Wrap the Twine: Starting at the top of the drumsticks, wrap the twine around the crossed legs. Pull the twine tight to secure the legs together.
- Tie a Knot: Make a simple overhand knot to hold the legs in place. For added security, you can tie a second knot.
Step 6: Secure the Body
- Wrap the Twine Around the Body: Bring the twine up and around the body of the turkey, ensuring that it is tight against the breast. This will help keep the breast meat from drying out.
- Create a Figure Eight: If desired, you can create a figure-eight pattern with the twine around the legs and body for additional support.
Step 7: Finalize the Trussing
- Tie Off the Twine: Once you have secured the legs and body, tie off the twine with a double knot to ensure it stays in place during cooking.
- Trim Excess Twine: Use scissors to trim any excess twine, leaving enough to ensure the knots remain secure.
Step 8: Ready for Roasting
- Place the Turkey in the Oven: Your trussed turkey is now ready to be seasoned and placed in the oven for roasting. Follow your preferred recipe for cooking times and temperatures.
Tips for Successful Trussing
- Use Quality Twine: Ensure that you are using unbleached cotton kitchen twine or butcher’s twine, as synthetic twine can melt during cooking.
- Don’t Over-Tighten: While it’s important to secure the turkey, avoid over-tightening the twine, as this can cause the skin to tear.
- Practice: If you are new to trussing, practice on a smaller bird or use a chicken to get comfortable with the technique before attempting it on a turkey.
- Consider a Stringless Method: If you prefer not to use twine, you can use the turkey’s skin to secure the legs by tucking them into slits made in the skin.
- Watch Tutorials: If you are unsure about the trussing process, consider watching video tutorials for visual guidance.
FAQ Section
Q1: Why should I truss a turkey?
A1: Trussing helps the turkey cook evenly, improves presentation, and keeps the stuffing inside the cavity.
Q2: How do I truss a turkey without twine?
A2: You can use the skin to secure the legs by making small slits and tucking the drumsticks into them.
Q3: What type of twine should I use for trussing?
A3: Use unbleached cotton kitchen twine or butcher’s twine. Avoid synthetic twine, as it may melt during cooking.
Q4: Can I truss a turkey that has been brined?
A4: Yes, you can truss a brined turkey. Just ensure that the turkey is thoroughly rinsed and dried before trussing.
Q5: How tight should I tie the twine when trussing?
A5: The twine should be snug enough to hold the legs and wings in place but not so tight that it tears the skin.
Q6: Is it necessary to truss a turkey?
A6: While it is not strictly necessary, trussing can improve cooking results and presentation, making it a common practice for many cooks.
Q7: How long should I roast a trussed turkey?
A7: Cooking times will vary based on the weight of the turkey. Generally, a trussed turkey will take about 13-15 minutes per pound at 325°F (163°C).
Q8: Can I truss a turkey ahead of time?
A8: Yes, you can truss a turkey several hours in advance and refrigerate it until you are ready to roast it.
Q9: What if I forget to truss my turkey?
A9: If you forget to truss your turkey, it can still be roasted successfully. However, the cooking time may vary, and the presentation may not be as neat.
Q10: Where can I find more information about cooking and preparing turkey?
A10: For more detailed information, you can visit the USDA website dedicated to food safety and cooking guidelines.
Conclusion
Trussing a turkey is a valuable skill that can enhance your cooking experience and improve the presentation of your holiday meal. By following the steps outlined in this guide, you can confidently truss your turkey and ensure even cooking. Whether you are a seasoned chef or a novice cook, mastering the art of trussing will help you create a delicious and visually appealing dish that your guests will love. With practice and patience, you can make your turkey the star of the table this holiday season.
Summary Table
| Step | Description |
|---|---|
| Prepare the Turkey | Thaw, remove giblets, and pat dry. |
| Cut the Twine | Cut a 3-foot piece of kitchen twine. |
| Position the Turkey | Place the turkey breast-side up. |
| Tuck the Wings | Tuck the wing tips behind the shoulders. |
| Tie the Legs | Cross the drumsticks and wrap the twine around them. |
| Secure the Body | Wrap the twine around the body and create a figure-eight pattern. |
| Finalize the Trussing | Tie off the twine with a double knot and trim excess. |
| Ready for Roasting | Season and place the trussed turkey in the oven. |
This comprehensive guide on how to truss a turkey provides detailed instructions, tips, and answers to common questions. By mastering this technique, you can elevate your turkey cooking skills and impress your guests during festive gatherings.