How to Trim a Brisket: A Comprehensive Guide
Trimming a brisket is a crucial step in preparing this cut of meat for smoking or cooking. Proper trimming enhances the flavor, texture, and overall quality of the final dish. Whether you are a backyard barbecue enthusiast or a seasoned pitmaster, knowing how to trim a brisket effectively can make a significant difference in your cooking results. This article will provide a detailed, step-by-step guide on how to trim a brisket, along with tips, techniques, and frequently asked questions.
Understanding Brisket
Brisket is a cut of meat from the breast or lower chest of beef. It is known for its rich flavor and tenderness when cooked properly. The brisket consists of two main muscles:
- Flat: The leaner part of the brisket, which is more uniform in shape and is often used for slicing.
- Point: A fattier section that has more marbling and is typically used for making burnt ends.
Why Trimming is Important
Trimming a brisket serves several purposes:
- Fat Management: Excess fat can prevent the meat from cooking evenly and can lead to an overly greasy final product.
- Shape and Size: Trimming helps create a uniform shape that allows for even cooking and better smoke penetration.
- Flavor Enhancement: Removing hard fat and silverskin allows rubs and seasonings to adhere better to the meat, enhancing flavor.
Tools Needed for Trimming Brisket
Before you begin trimming, gather the necessary tools:
- Sharp Knife: A boning knife or flexible fillet knife is ideal for precise trimming.
- Cutting Board: A large, sturdy cutting board provides ample space for maneuvering.
- Nitrile Gloves: These help maintain hygiene and provide a better grip on the meat.
- Paper Towels: Useful for cleaning up any mess during the process.
Step-by-Step Guide to Trimming Brisket
Step 1: Prepare Your Workspace
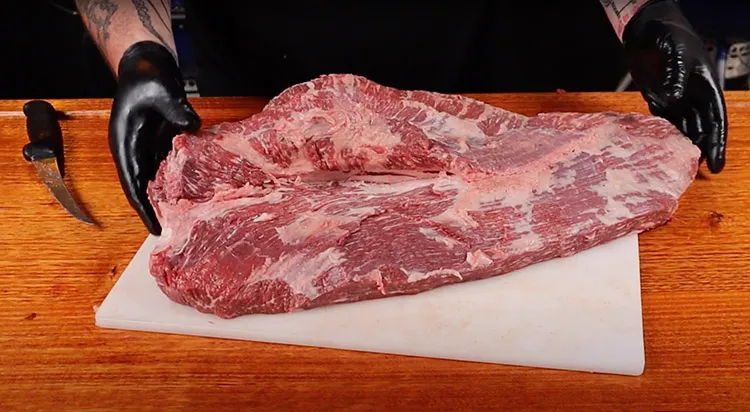
Ensure your workspace is clean and organized. Place your cutting board on a stable surface and have all your tools within reach. Remove the brisket from its packaging and pat it dry with paper towels.
Step 2: Assess the Brisket
Examine the brisket closely. Identify areas with excess fat, hard fat seams, or silverskin that need trimming. Understanding the structure of the brisket will help you know where to focus your efforts.
Step 3: Trim the Fat Cap
The fat cap is the thick layer of fat on one side of the brisket. Here’s how to trim it:
- Angle Your Knife: Hold your knife at a slight angle to avoid cutting too deep into the meat.
- Remove Excess Fat: Aim to leave about 1/4 inch of fat on the cap. This layer will render during cooking, adding moisture and flavor.
- Check Thickness: Use your fingers to gauge thickness as you trim; some areas may require more attention than others.
Step 4: Remove Hard Fat and Silverskin
Look for hard pieces of fat that won’t render during cooking. These should be removed completely:
- Identify Hard Fat: This fat appears dense and white.
- Cut Along Seams: Use your knife to cut along seams where hard fat meets meat.
- Remove Silverskin: Silverskin is a tough membrane that should be trimmed away as it does not break down during cooking.
Step 5: Shape the Brisket
Shaping your brisket helps ensure even cooking:
- Square Off Edges: Trim any loose or hanging pieces of meat from the edges.
- Round Corners: Round off sharp corners to prevent them from drying out during cooking.
Step 6: Flip and Trim the Underside
Once you’ve finished with the top side, flip the brisket over:
- Trim Excess Fat on Underside: Remove any remaining hard fat or silverskin from this side as well.
- Even Out Shape: Ensure both sides are uniform in thickness for consistent cooking.
Tips for Effective Trimming
- Work Quickly but Carefully: The fat can warm up quickly, making it harder to cut cleanly.
- Use Sharp Knives: A sharp knife makes precise cuts easier and safer.
- Practice Makes Perfect: If you’re new to trimming briskets, don’t worry if it’s not perfect—experience will improve your technique over time.
Common Mistakes When Trimming Brisket
- Removing Too Much Fat: While it’s important to trim excess fat, removing too much can lead to dry meat.
- Not Trimming Enough: Leaving too much hard fat can result in an undesirable texture.
- Ignoring Shape: Failing to shape the brisket properly can lead to uneven cooking.
FAQ Section
How much fat should I leave on my brisket?
Aim to leave about 1/4 inch of fat on the fat cap for moisture during cooking.
Can I trim my brisket ahead of time?
Yes, you can trim your brisket up to a day in advance; just wrap it tightly in plastic wrap and refrigerate it.
What if I accidentally cut too deep?
If you cut too deep into the meat, don’t worry! Just continue with your preparation; it won’t ruin the brisket.
Should I remove all visible fat?
No, some fat is necessary for flavor and moisture; focus on removing hard pieces rather than all visible fat.
Is there a specific way to hold my knife while trimming?
Hold your knife at an angle away from yourself for better control and safety while trimming.
Conclusion
Trimming a brisket is an essential skill for anyone looking to prepare this delicious cut of meat properly. By following these steps and tips, you can ensure that your brisket will cook evenly, remain flavorful, and be tender when served. With practice, you’ll become more confident in your trimming abilities, leading to better barbecue results every time.For further information on beef cuts and preparation techniques, please refer to Wikipedia.