Understanding Air Mattress Construction
Before diving into the repair process, it’s essential to understand the basic construction of an air mattress. Most air mattresses are made from PVC (polyvinyl chloride) or vinyl, which are both flexible and durable materials. However, these materials can become punctured or develop small holes over time due to wear and tear, environmental factors, or sharp objects.
Common Causes of Leaks
- Punctures from Sharp Objects: Camping gear, pet claws, or even furniture can cause punctures.
- Overinflation: Excessive pressure can stress seams and materials, leading to leaks.
- Temperature Changes: Extreme temperatures can cause the material to expand and contract, leading to cracks or holes.
- Wear and Tear: Regular use can lead to thin spots in the material, making it more susceptible to leaks.
Tools and Materials Needed for Repair
To fix a hole in your air mattress, you will need the following tools and materials:
| Tool/Material | Purpose |
|---|---|
| Patch Kit | Contains vinyl patches and adhesive for repairs. |
| Duct Tape (optional) | Temporary fix for small holes or leaks. |
| Scissors | To cut patches to the appropriate size. |
| Marker | To mark the location of the hole. |
| Dish Soap and Water | To create a soapy solution for detecting leaks. |
| Heavy Object | To apply pressure on the patch while it cures. |
| Alcohol Wipes | For cleaning the area around the hole. |
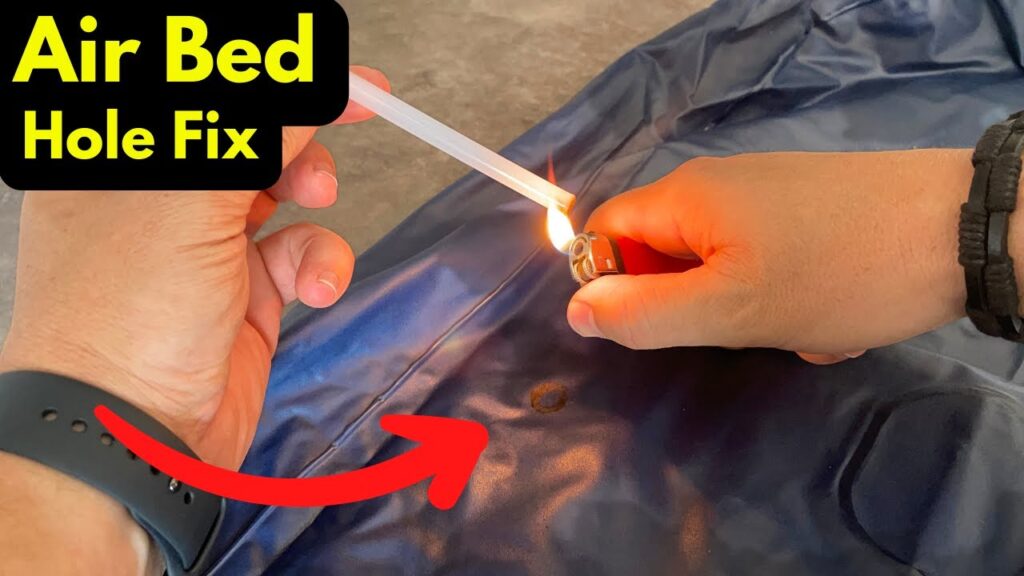
Step-by-Step Guide to Fixing a Hole in an Air Mattress
Step 1: Locate the Hole
The first step in repairing your air mattress is to locate the hole. Here’s how to do it:
- Inflate the Mattress: Fully inflate the mattress to its normal shape.
- Listen for Hissing: Move your ear close to the surface and listen for any hissing sounds indicating escaping air.
- Feel for Air: Run your hand along the surface to feel for air escaping.
- Mark the Hole: Once you find the hole, circle it with a marker for easy identification.
If you cannot locate the hole by sound or touch, you can use a soapy water solution:
- Mix Dish Soap and Water: Combine a few drops of dish soap with water in a spray bottle.
- Spray the Mattress: Lightly spray the surface of the mattress while pressing down. Look for bubbles forming, which indicate the location of the leak.
Step 2: Prepare the Area
Once you have located the hole, it’s time to prepare the area for patching:
- Deflate the Mattress: Completely deflate the mattress to ensure a secure patch.
- Clean the Area: Use alcohol wipes to clean the area around the hole, removing any dirt or residue that could affect the adhesive.
Step 3: Apply the Patch
Now that the area is clean and dry, you can apply the patch:
- Cut the Patch: If using a patch kit, cut a patch that is at least one inch larger than the hole on all sides. Round the edges of the patch to prevent peeling.
- Apply Adhesive: Follow the instructions on your patch kit. Generally, you will apply adhesive to the patch or the area around the hole.
- Position the Patch: Carefully place the patch over the hole, ensuring it is centered.
- Press Firmly: Press down firmly on the patch to eliminate air bubbles and ensure a tight seal.
Step 4: Apply Pressure and Allow to Cure
To ensure the patch adheres properly, apply pressure:
- Use a Heavy Object: Place a heavy object, such as a book or box, on top of the patched area.
- Cure Time: Allow the adhesive to cure for the recommended time (usually several hours or overnight) before removing the weight.
Step 5: Test the Seal
After the patch has cured, it’s time to test the repair:
- Inflate the Mattress: Fully inflate the mattress again.
- Check for Leaks: Press down on the mattress and listen for any hissing sounds or feel for escaping air.
- Lay on the Mattress: If comfortable, lay on the mattress for a few minutes to ensure it holds air.
If the patch holds and there are no signs of air escaping, you have successfully repaired your air mattress.
Temporary Fixes for Air Mattress Leaks
If you need a quick solution before you can perform a proper repair, consider these temporary fixes:
- Duct Tape: Apply duct tape over the hole, ensuring it overlaps the hole by at least one inch. This can hold for a short time but is not a permanent solution.
- Plastic Bag: In a pinch, you can cut a piece from a plastic bag, apply adhesive, and press it over the hole. This is a temporary fix until you can patch it properly.
- Super Glue: For small holes, applying a small amount of super glue can help seal the leak temporarily. However, this should be followed up with a proper patch.
Preventing Future Leaks
To extend the life of your air mattress and prevent future leaks, consider the following tips:
- Avoid Sharp Objects: Keep sharp items away from the mattress, especially when camping or in outdoor settings.
- Proper Inflation: Do not overinflate your mattress. Follow the manufacturer’s instructions for optimal inflation levels.
- Store Properly: When not in use, store the mattress in a cool, dry place, away from direct sunlight and extreme temperatures.
- Regular Inspections: Periodically check your mattress for signs of wear or damage, and address any issues immediately.
FAQ Section
Q1: How do I know if my air mattress has a hole?
A1: Inflate the mattress and listen for hissing sounds or feel for air escaping. You can also use a soapy water solution to identify leaks by looking for bubbles.
Q2: Can I use duct tape to fix an air mattress?
A2: Duct tape can be used as a temporary fix, but it is not a permanent solution. For a more reliable repair, use a proper patch kit.
Q3: How long does it take for the patch to cure?
A3: The curing time varies depending on the adhesive used, but it is generally recommended to let the patch set for several hours or overnight.
Q4: What if the patch doesn’t hold?
A4: If the patch does not hold, check for additional holes or leaks and repeat the repair process. Ensure the area is clean and dry before applying a new patch.
Q5: Can I fix a large hole in my air mattress?
A5: Yes, larger holes can be repaired using a patch kit designed for air mattresses. Ensure the patch is large enough to cover the hole with at least one inch of overlap.
Q6: Is it safe to use super glue for repairs?
A6: Super glue can be used for small holes as a temporary fix, but it is recommended to follow up with a proper patch for a more durable repair.
Q7: How can I prevent leaks in my air mattress?
A7: Avoid sharp objects, do not overinflate, store the mattress properly, and regularly inspect it for wear and tear.
Q8: Where can I find a patch kit for my air mattress?
A8: Patch kits can be found at most camping supply stores, hardware stores, or online retailers.
Q9: Can I use household items to patch my air mattress?
A9: Yes, items like duct tape, plastic bags, and even rubber cement can work as temporary solutions, but they are not as reliable as a proper patch kit.
Q10: Where can I find more information about air mattress repairs?
A10: For detailed information, you can visit the Wikipedia page dedicated to air mattresses.
Conclusion
Repairing a hole in an air mattress is a manageable task that can save you from the frustration of a deflating bed. By following the steps outlined in this guide, you can effectively locate and patch holes, ensuring your air mattress remains functional for years to come. Regular maintenance and proper storage will also help prevent future leaks, allowing you to enjoy the convenience of your air mattress without worry. Whether for camping, guests, or home use, a well-maintained air mattress can provide comfort and convenience when you need it most.