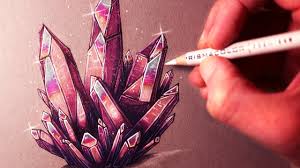
How to Draw Crystals: A Comprehensive Guide
Drawing crystals can be a rewarding artistic endeavor, allowing you to explore shapes, reflections, and the intricate beauty of these natural formations. This guide will provide you with the techniques, tips, and step-by-step instructions needed to successfully draw various types of crystals. Whether you are a beginner or an experienced artist, this article will help enhance your skills and understanding of crystal drawing.
Understanding Crystals
What Are Crystals?
Crystals are solid materials whose atoms are arranged in highly ordered, repeating patterns. They can be found in various forms and sizes and are often characterized by their geometric shapes and reflective surfaces. Common types of crystals include:
- Quartz
- Amethyst
- Diamond
- Sapphire
The Science Behind Crystals
Crystals form through various processes, including cooling from a molten state or evaporating from a solution. The conditions under which they form can greatly influence their size, shape, and clarity.
Importance of Light in Crystal Drawing
Light plays a crucial role in how we perceive crystals. The way light refracts and reflects off the surfaces can create stunning visual effects that artists aim to capture in their drawings.
Materials Needed for Drawing Crystals
Before starting your drawing, gather the following materials:
- Pencils: A range of pencils (HB, 2B, 4B) for different shading techniques.
- Paper: Smooth drawing paper or sketch paper.
- Eraser: A kneaded eraser works well for fine details.
- Blending Stumps: For smooth shading transitions.
- Ruler: For creating geometric shapes.
- Reference Images: Photos or real-life crystals for inspiration.
Techniques for Drawing Crystals
1. Basic Shapes and Forms
Start by understanding the basic geometric shapes that make up crystals. Most crystals can be broken down into simple forms like:
- Cubes
- Pyramids
- Prisms
- Octahedrons
2. Sketching the Outline
Begin your drawing by lightly sketching the outline of the crystal using an HB pencil. Focus on getting the proportions right before adding details.
Steps:
- Use a ruler to draw straight lines for edges.
- Lightly mark the vertices where the edges meet.
- Ensure symmetry by comparing both sides of your crystal.
3. Adding Details
Once the outline is complete, start adding details such as facets and reflections.
Tips:
- Observe how light interacts with the crystal surfaces.
- Use short, straight lines to indicate facets.
- Vary line thickness to create depth.
4. Shading Techniques
Shading is essential for giving your crystal a three-dimensional appearance.
Techniques:
- Hatching: Use parallel lines to create texture.
- Cross-Hatching: Overlay lines at different angles for darker areas.
- Blending: Use blending stumps to smooth out pencil marks for softer shadows.
5. Highlighting Reflections
Crystals often have bright highlights due to their reflective surfaces.
Steps:
- Identify where the light source is coming from.
- Leave areas white or lightly shaded to represent highlights.
- Use an eraser to lift graphite in these areas for a more pronounced effect.
6. Final Touches
Review your drawing and make any necessary adjustments. Add more shading or refine edges as needed.
Step-by-Step Drawing Example: Quartz Crystal
Step 1: Outline
Draw a simple quartz crystal shape using straight lines to define its edges.
Step 2: Add Facets
Sketch in the facets by adding triangular shapes along the edges.
Step 3: Shading
Use hatching techniques on one side of the crystal to create depth while leaving the opposite side lighter for contrast.
Step 4: Highlights
Identify where light hits the crystal and erase small sections to create bright highlights.
Step 5: Finalize
Go over your lines with a darker pencil (e.g., 2B) for emphasis and add any final details.
Table: Summary of Crystal Drawing Techniques
| Technique | Description |
|---|---|
| Basic Shapes | Understand geometric forms like cubes and prisms |
| Sketching | Lightly outline with an HB pencil |
| Adding Details | Include facets and reflections |
| Shading Techniques | Use hatching, cross-hatching, and blending |
| Highlighting Reflections | Leave areas white or lightly shaded |
| Final Touches | Refine edges and add depth |
For more information about crystals and their properties, you can refer to Wikipedia.
Frequently Asked Questions (FAQ)
How do I start drawing crystals?
Begin by sketching basic geometric shapes that represent the crystal’s structure before adding details and shading.
What materials do I need?
You will need pencils, paper, an eraser, blending stumps, a ruler, and reference images of crystals.
Can I use colored pencils?
Yes! Colored pencils can add vibrancy to your crystal drawings; just ensure you understand shading techniques with colors as well.
How can I improve my shading techniques?
Practice different shading methods like hatching and blending on separate sheets before applying them to your final drawing.
Should I draw from real life or photos?
Both methods are valid; however, drawing from real life allows you to observe light interactions more closely.
How long does it take to draw a crystal?
The time varies based on complexity; simple sketches may take about 30 minutes, while detailed drawings could take several hours.
Can I use digital tools for drawing crystals?
Absolutely! Digital art software provides excellent tools for creating detailed crystal drawings with layers and effects.
How do I capture reflections accurately?
Observe where light hits your reference image and replicate those bright spots in your drawing while maintaining contrast with darker areas.
Is it necessary to draw every facet?
No, focus on capturing the essence of the crystal rather than every single detail; this will help maintain clarity in your artwork.
Read more about it:https://greyhoundsverdevalley.com/wp-admin/post.php?post=8398&action=edit


