How to Draw a Human Heart
Drawing a human heart can be a rewarding artistic endeavor, whether for educational purposes, artistic expression, or personal interest. This guide will walk you through the process step by step, ensuring that you understand both the anatomical structure of the heart and the artistic techniques needed to create a realistic representation.
Table of Key Information
| Detail | Information |
|---|---|
| Subject | Human Heart |
| Basic Structure | Four chambers: Right Atrium, Right Ventricle, Left Atrium, Left Ventricle |
| Valves | Tricuspid, Pulmonary, Mitral, Aortic |
| Major Blood Vessels | Aorta, Pulmonary Arteries, Superior and Inferior Vena Cava |
| Location in Body | Center of the chest, slightly to the left |
| Average Size | About the size of a clenched fist |
Understanding Heart Anatomy
Before diving into the drawing process, it’s essential to understand the basic anatomy of the human heart:
- Chambers: The heart has four chambers:
- Right Atrium: Receives deoxygenated blood from the body.
- Right Ventricle: Pumps deoxygenated blood to the lungs.
- Left Atrium: Receives oxygenated blood from the lungs.
- Left Ventricle: Pumps oxygenated blood to the rest of the body.
- Valves: The heart contains four main valves that ensure blood flows in one direction:
- Tricuspid Valve: Between the right atrium and right ventricle.
- Pulmonary Valve: Between the right ventricle and pulmonary artery.
- Mitral Valve: Between the left atrium and left ventricle.
- Aortic Valve: Between the left ventricle and aorta.
- Blood Vessels: Major blood vessels associated with the heart include:
- Aorta: The largest artery in the body, carrying oxygenated blood from the left ventricle.
- Pulmonary Arteries: Carry deoxygenated blood to the lungs.
- Superior and Inferior Vena Cava: Bring deoxygenated blood from the body back to the right atrium.
Materials Needed
Before you start drawing, gather the following materials:
- Pencils (HB for sketching, 2B or 4B for shading)
- Eraser
- Drawing paper
- Colored pencils or markers (optional)
- Reference images of the human heart
Step-by-Step Drawing Instructions
Step 1: Basic Outline
- Draw the Heart Shape: Start by sketching a basic heart shape. The heart is not a perfect heart symbol; it has a more rounded top and a pointed bottom. Use light pencil strokes to create the outline.
- Divide the Heart: Lightly draw a vertical line down the center to help you place the chambers accurately.
Step 2: Adding Chambers
- Right Atrium and Ventricle: On the right side of the heart shape, draw the right atrium as a small rounded section at the top and the right ventricle as a larger rounded section below it.
- Left Atrium and Ventricle: On the left side, draw the left atrium as a similar small rounded section at the top and the left ventricle as a larger section below it.
Step 3: Drawing Valves
- Tricuspid Valve: Draw the tricuspid valve between the right atrium and right ventricle. It can be represented as a small flap.
- Mitral Valve: Similarly, draw the mitral valve between the left atrium and left ventricle.
- Pulmonary and Aortic Valves: Add the pulmonary valve at the exit of the right ventricle and the aortic valve at the exit of the left ventricle.
Step 4: Adding Major Blood Vessels
- Aorta: Draw the aorta arching from the left ventricle and extending upward.
- Pulmonary Arteries: From the pulmonary valve, draw the pulmonary arteries leading to the lungs.
- Vena Cava: Sketch the superior and inferior vena cava entering the right atrium.
Step 5: Detailing the Heart
- Add Texture: Use shading techniques to add depth to the heart. The myocardium (muscular layer) can be shaded darker to indicate thickness.
- Label the Parts: If this is for educational purposes, label each part of the heart clearly.
Step 6: Coloring (Optional)
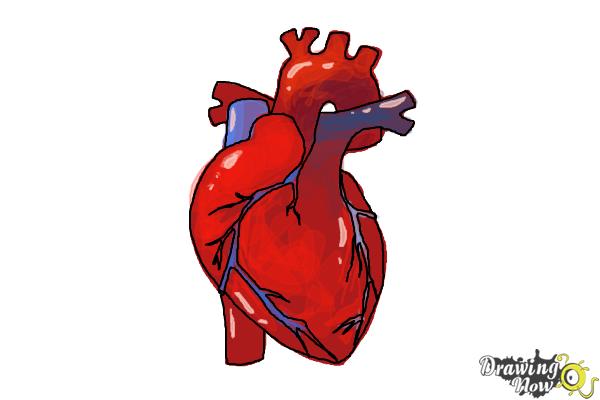
- Use Colored Pencils or Markers: Color the heart using realistic colors. The left side can be shaded in red to represent oxygenated blood, while the right side can be shaded in blue for deoxygenated blood.
- Highlight Important Features: Use a lighter shade to highlight the valves and major blood vessels.
Tips for Drawing a Human Heart
- Use References: Always refer to anatomical diagrams or real images of the heart to ensure accuracy.
- Practice: Drawing the heart multiple times will help you understand its structure better.
- Experiment with Styles: You can draw a realistic heart or a stylized version depending on your artistic goals.
FAQ Section
Q1: How long does it take to learn to draw a human heart?
A1: The time varies depending on your skill level. With practice, you can learn the basics in a few hours but mastering the details may take longer.
Q2: What are some common mistakes when drawing a heart?
A2: Common mistakes include incorrect proportions, not capturing the heart’s tilt, and neglecting to include details like valves and blood vessels.
Q3: Can I use digital tools to draw a heart?
A3: Yes, digital drawing tools can be used, and many artists prefer software like Adobe Illustrator or Procreate for precision.
Q4: Is it necessary to label the heart when drawing it?
A4: Labeling is essential for educational purposes, especially in biology classes, but it is not necessary for artistic representations.
Q5: What is the best way to practice drawing the heart?
A5: Practice by sketching from references, using different angles, and experimenting with various styles and techniques.
Conclusion
Drawing a human heart is not only an artistic challenge but also an opportunity to learn about one of the most vital organs in the human body. By following the steps outlined in this guide, you can create a detailed and accurate representation of the heart. Remember to be patient with yourself, practice regularly, and enjoy the process of learning and creating.For more detailed anatomical information about the human heart, you can refer to the Wikipedia page on the Heart.