The Art of Drawing Hands: A Comprehensive Guide
Hands are one of the most expressive and complex parts of the human body, making them a challenging yet rewarding subject for artists to tackle. From the intricate details of the fingers to the subtle nuances of the skin, drawing hands requires a keen eye for observation and a mastery of various techniques. In this comprehensive guide, we will explore the fundamentals of hand anatomy, the essential tools and materials, and step-by-step tutorials for drawing hands in various poses and styles.
Understanding Hand Anatomy
Before delving into the drawing process, it’s crucial to have a basic understanding of hand anatomy. The hand is composed of several bones, muscles, tendons, and ligaments that work together to create a wide range of movements and gestures. By studying the structure of the hand, artists can better understand how to accurately depict its form and proportions.The hand is divided into three main parts: the palm, the fingers, and the thumb. The palm is made up of five metacarpal bones, while each finger contains three phalanges (except for the thumb, which has two). The thumb is opposable, allowing the hand to grasp and manipulate objects.Understanding the joints and their range of motion is also essential for drawing hands accurately. The knuckles, or interphalangeal joints, allow the fingers to bend and flex, while the metacarpophalangeal joints (where the fingers meet the palm) provide a wider range of motion.
Essential Tools and Materials
When it comes to drawing hands, the tools and materials you use can greatly impact the final result. Here are some essential items to have in your arsenal:
- Pencils: A range of pencils, from 2H to 6B, will allow you to create a variety of line weights and shading effects.
- Erasers: A kneaded eraser and a white plastic eraser are useful for making corrections and creating highlights.
- Drawing paper: Choose a high-quality paper that can withstand multiple layers of pencil without becoming too textured or damaged.
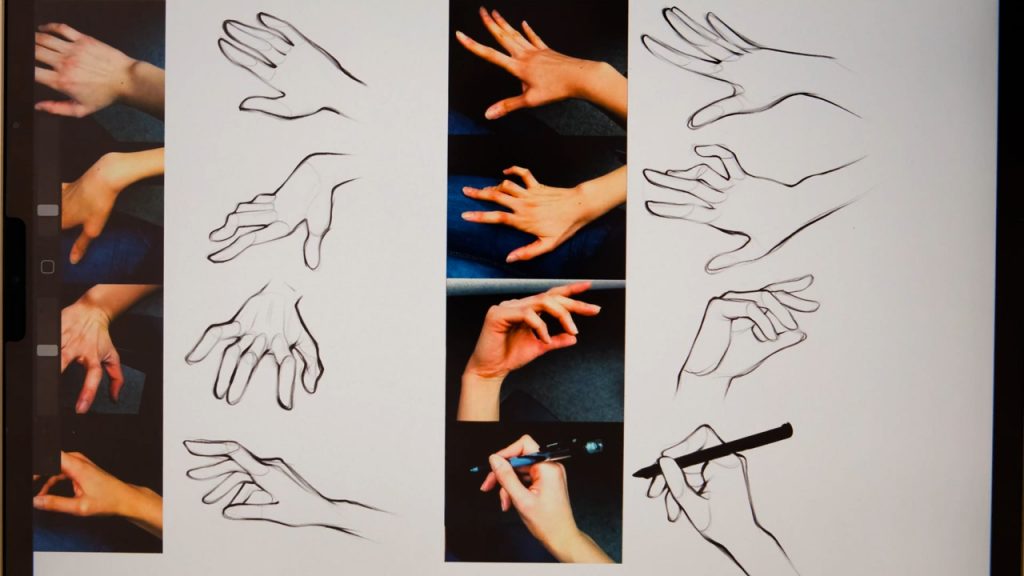
- Reference images: Collect a variety of hand reference images, including photos and illustrations, to use as inspiration and guidance.
- Anatomy books: Invest in a good anatomy book or resource that provides detailed information on hand structure and proportions.
Drawing Hands in Various Poses
One of the keys to drawing hands successfully is to practice drawing them in a variety of poses and positions. Here are some common hand poses to practice:
- Open palm: Draw the hand with the palm facing the viewer, fingers spread apart.
- Fist: Draw the hand clenched into a fist, with the knuckles visible.
- Pointing finger: Draw the hand with one finger extended, as if pointing at something.
- Grasping: Draw the hand grasping an object, such as a pencil or a cup.
- Relaxed: Draw the hand in a relaxed position, with the fingers slightly curled and the palm facing down.
Step-by-Step Tutorials
Now that you have a basic understanding of hand anatomy and the essential tools and materials, let’s dive into some step-by-step tutorials for drawing hands.
Tutorial 1: Drawing a Hand in an Open Palm Position
- Begin with a simple shape: Draw a rectangle to represent the palm, with a slight curve at the top to indicate the knuckles.
- Add the fingers: Draw five circles at the top of the rectangle to represent the knuckles. Draw the fingers as tapered cylinders, with the middle finger being the longest.
- Refine the shape: Draw an outline around the hand, adding details such as the webbing between the fingers and the creases at the joints.
- Add shading: Use a range of pencils to add shading and highlights, creating depth and texture in the hand.
Tutorial 2: Drawing a Hand in a Fist Position
- Begin with a simple shape: Draw a rectangle to represent the palm, with a slight curve at the top to indicate the knuckles.
- Add the fingers: Draw five circles at the top of the rectangle to represent the knuckles. Draw the fingers as tapered cylinders, with the thumb overlapping the other fingers.
- Refine the shape: Draw an outline around the hand, adding details such as the creases at the joints and the wrinkles on the skin.
- Add shading: Use a range of pencils to add shading and highlights, creating depth and texture in the hand.
Tutorial 3: Drawing a Hand Grasping an Object
- Begin with a simple shape: Draw a rectangle to represent the palm, with a slight curve at the top to indicate the knuckles.
- Add the fingers: Draw five circles at the top of the rectangle to represent the knuckles. Draw the fingers as tapered cylinders, with the thumb overlapping the other fingers and the object being grasped.
- Refine the shape: Draw an outline around the hand and the object, adding details such as the creases at the joints and the texture of the object.
- Add shading: Use a range of pencils to add shading and highlights, creating depth and texture in the hand and the object.
Frequently Asked Questions (FAQ)
- What are the most important things to remember when drawing hands?
- Understanding hand anatomy, practicing drawing hands in various poses, and using reference images are essential for creating accurate and expressive hand drawings.
- How do I draw hands that look proportional?
- Pay attention to the relative sizes of the palm and fingers, and use the “rule of thumb” (the thumb should be about the same length as the index finger) to ensure proper proportions.
- What are some common mistakes to avoid when drawing hands?
- Avoid making the fingers too long or too short, drawing the fingers as straight lines instead of tapered cylinders, and neglecting to add details such as knuckles and creases.
- How do I add realism to my hand drawings?
- Use a range of pencils to create varied line weights and shading effects, pay attention to the placement of highlights and shadows, and add subtle details such as wrinkles and veins.
- Can I use photo references when drawing hands?
- Yes, using photo references can be extremely helpful for capturing accurate proportions and details. However, it’s important to use the references as a guide and not to simply copy them.
- How do I draw hands in different positions and poses?
- Practice drawing hands in a variety of positions, such as open palm, fist, pointing finger, and grasping. Pay attention to how the hand’s shape and proportions change in each pose.
- What are some good resources for learning more about hand anatomy?
- Anatomy books, online tutorials, and life drawing classes are all great resources for learning more about hand anatomy and improving your drawing skills.
- How do I add expression and emotion to my hand drawings?
- Pay attention to the overall posture and gesture of the hand, and use details such as the position of the fingers and the tension in the muscles to convey emotion and expression.
- Can I use digital tools to draw hands?
- Yes, digital tools such as Photoshop and Procreate offer a range of brushes and features that can be used to create hand drawings. However, the fundamentals of hand anatomy and drawing still apply.
- How do I practice and improve my hand drawing skills?
- Practice drawing hands regularly, using a variety of reference images and poses. Experiment with different techniques and materials, and seek feedback from other artists to identify areas for improvement.
Comparison of Hand Drawing Techniques
| Technique | Description | Suitable for |
|---|---|---|
| Contour drawing | Drawing the outline of the hand without lifting the pencil | Capturing the overall shape and gesture of the hand |
| Cross-hatching | Using intersecting lines to create shading and texture | Adding depth and dimension to the hand |
| Stippling | Using small dots to create shading and texture | Creating a detailed, textured effect |
| Blending | Using a blending stump or your finger to smooth out shading | Softening edges and creating a more realistic effect |
| Erasing | Using an eraser to create highlights and add details | Refining the drawing and adding finishing touches |
Source: Wikipedia – Drawing Techniques
Conclusion
Drawing hands is a challenging yet rewarding pursuit for artists of all levels. By understanding hand anatomy, practicing various poses and techniques, and using reference images and resources, you can develop the skills necessary to create accurate and expressive hand drawings. Remember to be patient with yourself, experiment with different approaches, and seek feedback from others to continually improve your skills. With dedication and practice, you can master the art of drawing hands and take your artistic skills to new heights.